Saturday, August 13, 2016

Jump In, Jump Out!


Summer is officially over, and I've had my first two days with students. I needed a name refresher activity that my students would enjoy, and "Jump In, Jump Out" was the perfect start to our school year. When a sixth grade student lingers after class, beams, and exclaims, "Thank you! That was SO much fun," you know you've picked well. 


There are different versions of the poem floating around, and there are different ways to perform it. I usually tweak things a bit, so I came up with the following format:

Class:
Jump in, jump out! Turn yourself around.
I said, jump in, jump out! Introduce yourself.

Soloist: (Class)
My name is__________ (yeah)
And I like __________ (yeah)
And I can __________ (yeah)

Class:
All right, all right, all right!

Circle game:
  • Jump in, jump out: everyone jumps in the circle and back out
  • Turn yourself around – turn in place one time
  • Jump in, jump out (repeat as before)
  • Introduce yourself – one student steps to the center of the circle to speak the solo part. (I placed a polyspot in the center and instructed children to step to the spot to speak.) 
  • Class answers each statement with, “Yeah” and copies the action of the soloist on “All right, all right, all right!”
  • Repeat poem with the next person in the circle stepping forward as the soloist. Continue until everyone has had a turn. Students can add claps or teacher can add a drum to help them speak in rhythm.
Here is a video of 4th graders and 6th graders demonstrating the game:


I created a PowerPoint presentation with a few examples for students to read and practice speaking in rhythm. I displayed the final slide with blanks for them while they played so the soloist could look at the lyrics if they needed assistance.

The complete PowerPoint presentation is available at my TpT Store:

Teaching Process:
  • Teach poem by rote, using the first lyric slide and completing the blanks with personal information.  Demonstrate speaking in rhythm and performing an action on the “I can” statement.
  • Lead the class in reading the next 3 slides together in rhythm. Divide into two groups and take turns reading the solo and class parts. Point out the option of “My name is” or “My name’s,” depending on which works best with the name.
  • Display the final slide with blanks. Instruct students to think of what they plan to say for each blank. Remind them the “I can” statement should include a movement for students to copy. They should silently practice speaking the poem in rhythm while they wait for everyone to get ready. Students could also practice with a partner to make sure they are prepared with good choices.
Looking for more name games and other activities to start your year? Check out these previous blog posts:
All in all, "Jump In, Jump Out" was a great way to start back to school with my 4th-6th grade classes. Thinking about using this game with your students? I suggest that you go ahead and "Jump In!"

Saturday, August 6, 2016

Olympic Fanfare

The Olympics are on the horizon, and I plan to celebrate during music class! If you have access to older Share the Music books, there is a listening map in the second grade book for "Olympic Fanfare" that I have used with my classes. Here is a quick rundown of a quick activity to commemorate this wonderful event, even if you don't have access to the listening map.

1. Brainstorm and list Olympic events. Here is a complete list: Summer Olympic Sports

2. Listen to "Olympic Fanfare" and follow the listening map, if available. Note the different sections. Have students give a signal to indicate when they think the sections change. 

3. Discuss the form (ABCBA) and the tempo of the different sections.

4. Listen and move to the music:

  • A: March in place, as if participating in Opening Ceremony
  • B: Jog in place to the beat (Students can pretend to carry the torch)
  • C: Act out a sport in slow motion (Teacher can call out sports, or students can pick their own. They can change sports during this section, since it is long enough.)
  • B: Jog in place again
  • A: March again
5. You can add a game by playing the slow section and allowing different students to act out a sporting event in slow motion for the class to identify.

This would also be a great time to review the national anthem and discuss how each country's anthem is played when they win the gold. 

(UPDATE: I have created a PowerPoint file with a listening map and clipart of Olympic athletes for movement inspiration. It is a FREE download in my TpT store using the link below.)


Try this activity with your students. I love it, and I hope you will, too. My only complaint is that I have to wait so long before I can use it again!

Tuesday, August 2, 2016

Coming Soon!

Ideas and Resources I Want to Try 

Summer is a wonderful time! Time to sleep late. Time to enjoy leisurely days outside. Time to enjoy free time. Time to use that free time to plan for next year!

I enjoy using my free time to search for new ideas to incorporate into my teaching. Finding new resources or lesson ideas builds excitement for the new year. Thank you to all the wonderful music teachers who share on Pinterest, blogs, and in Facebook groups. Your knowledge and creativity is invaluable to us all!

I'm sad to say that my summer is over, but I'm excited to think about the newly discovered goodies I plan to try this year. Take a minute to scroll through these ideas and resources. You might want to try some, like I plan to do!

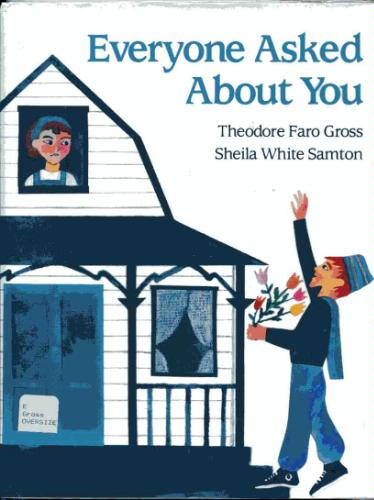
Everyone Asked About You


I heard about this book from a music teacher in a Facebook group, and I've already ordered it from Amazon. She said that she uses the book with her young students at the end of class, and it leaves them mesmerized. There is a song by Bob McGrath (Sesame Street) that fits with the book that I bought through iTunes. Here it is on YouTube:


My Roots Go Down

I fell in love with this song the moment I watched the video someone posted on Facebook. Maybe it's the catchy song, maybe it's the sweet way the dad allows his daughter to figure things out on her own, or maybe it's just the adorable girl singing so joyfully. I don't know, but I had to research and find out more. I found the composer's website with lyrics: SarahPirtle.com, and noticed that the lyrics were a little different. Pirtle states that she wants people to sing and share, so I'm sharing these simple lyrics and chords if you are interested. After you watch the video, you'll want them. Trust me!


My Roots Go Down
By: Sarah Pirtle

am a (G) maple tree growing at the school
I am a (C) maple tree growing at the (G) school
I am a maple tree growing at the (em) school
My (D7) roots go (G) down

(D) My roots go (G) down, down to the earth.
My roots go (C) down, down to the (G) earth.
My roots go down, down to the (em) earth.
My (D7) roots go (G) down.

* I am a wildflower growing in the meadow
* I am a mountain strong and still

Aurasma


This is an app that allows you to scan a photo that opens a video. You can video a class, put a photo in a newsletter or post in the hallway, and parents can watch the video. Perfect for Open House! I could write more, but I haven't used it yet. You should check out this blog post from Mrs. Dennis:  Aurasma in the Music Room.

Here is a video demonstration of how a music teacher utilizes the app:


BrainDance

BrainDance is a series of eight developmental movement patterns that humans naturally move through during the first year of life. The "dance" is said to be a wonderful full body and brain warm-up. I feel like I need to try this out in my classroom! You can read more about the philosophy and the specific movements here: Creative Dance or watch the video below for a quick demonstration of each of the 8 movement patterns. There are more videos on YouTube for more ideas.


Ukulele

I'm not ready to teach ukulele. I'm simply ready to learn how to PLAY one. Our school just added a preschool unit this year, so I figured it was the perfect time to pick up a stringed instrument to accompany simple songs. I thought I'd start with 4 strings, instead of 6 on a guitar. I am not great, but as long as I can play a I, IV, and V7 chord in a couple of keys, I'll feel like I've accomplished something!

How about you? Have you found some new ideas to try this year? It's a great way to stay fresh and excited about what we do. Have a happy new year!

Saturday, March 12, 2016

Birthday Cake Rhythms

Everyone loves birthday cake - especially 1st graders! A few years ago, I was using a visual included in our textbooks to introduce quarter and eighth notes. It included pictures of 1 or 2 pies per beat to demonstrate a rhythm. We began to come up with types of pie or cake to represent the two-sound beats, i.e. "ap-ple" or "lem-on." The most popular choice for the two-sound beats was "birth-day," because it paired perfectly with "cake" on the 1-sound beat. 

This year, I decided to kick it up a notch and create a set of bright, engaging, PowerPoint slides for the intro to quarter and eighth notes. The slides introduce students to the concept of 1 or 2 sounds per beat and also lead them into reading and playing rhythms with quarter and eighth notes. The slides logically progress in the following sequential manner:

Step 1:

The introductory slides include pictures of cakes with text below to lead students to read the rhythms using "cake" and "birthday."At this point, I used students to physically display these rhythms by having 1 or 2 students stand in an area designated for each of the 4 beats. My tile floor has a checkerboard pattern with 3 foot squares of white and tan, so we use each 3 foot box to represent a beat. I've also seen this done by having students share a chair or a polyspot on the floor (each person puts a foot on it when sharing). The bottom line is that you either have one student or two on each beat, and then the class reads the rhythm using whatever words or syllables you prefer. We begin by saying "cake" and "birthday." Students absolutely LOVE being part of a rhythm!


Step 2:

After we physically demonstrate and read the introductory slides, we move to the next ones that do not include text. As I work my way around the circle, I point to the beat the student is about to represent and ask, "Do you need a partner for your beat, or should you be alone?" The child figures it out and either comes alone, or brings the next person in the circle. After the rhythm is complete, we all read and pat it.

Step 3:

Once the students have all had a turn to be a part of a rhythm, and they also demonstrate the ability to read and pat the rhythms, we move to instruments to read and play them. You can use whatever you want. Pitched percussion can be set up in a pentaton to allow them to explore the bars and play whatever pitches they choose. We like to rotate after each turn.
For each turn, we follow this procedure:
1. Say It: Just say it, do not play it.
2. Say & Play It (twice): Say it while you play it. Students often forget to speak the rhythm while they are playing, and they do not play accurately. I tell them that their mouths "boss" their hands, which helps them play accurately. I also demonstrate what happens when they don't speak, and I start out playing correctly and then fall into playing a random pattern. We play it twice to give them extra practice, the opportunity to correct themselves, and a little more time with each instrument before they rotate to the next one.

Step 4:

The slides begin to include notes below the cakes. First, they are introduced with the text included, but that quickly disappears. I simply tell the students to start paying attention to the notes, because the cakes will be going away soon.

Step 5:

Finally, the cakes disappear, and students are reading actual notation. It happened so gradually that they didn't even realize how much they were learning while they were so busy playing instruments and having fun!
At this point, students are still saying "cake" and "birthday" for the quarter and eighth notes, but we will switch over to ta and ti-ti shortly.

If you are interested, my "Birthday Cake Rhythms" file is available at my TpT store. It includes a digital file with both PowerPoint and PDF versions.

Happy Birthday to All!

Thursday, February 11, 2016

Valentine Fun

I wanted a quick, fun activity to help celebrate Valentine's Day with my second grade classes today. I recalled taking a screenshot of an idea someone shared in a Facebook group. It was a take-off on "Bow, Wow, Wow." They had changed the lyrics for Valentine's. I found the picture I had taken and got busy getting the activity ready.

Suggested lyrics:
  • 1, 2, 3.
  • Who will it be?
  • Who will be my Valentine?
  • 1, 2, 3.
I had loved the idea of the movement activity, in which students stand in a circle, perform movements with one partner, and end by facing a new partner. I decided to tweak the lyrics a little to make the final lyrics different from the first line.

Tweaked version:
  • 1, 2, 3
  • Who will it be?
  • Who will be my Valentine?
  • Let me see!
Next, I created a PowerPoint presentation that included music notation (created in Sibelius). I included a slide for students to identify "mi-re-do" at the end. Also, I made up some silly lyrics to help demonstrate the movements we would be performing.

Movement lyrics:
  1. Pat, pat, pat.
  2. Shrug shoulders now.
  3. Join your hands and circle round 
  4. Wait, wait, turn!
  1. Pat hands with partner 3 times.
  2. Hands out, as if to ask a question, and slightly pulse the 3 beats.
  3. They actually just trade places, instead of circling all the way around.
  4. Cover eyes on "Let me" and then turn quickly in place & uncover eyes to discover who the new partner will be.
Students stand in a large circle and face a partner. After they join hands and switch places, they will turn at the end to face a new partner. Song/movements repeat until students return to their original partners.

You can grab a copy of the PowerPoint presentation at the link below:

Here is a video clip of second graders having fun with this activity. (We literally spent 15-20 minutes on this, so it really was quick!) The class was an inclusion class, and the children with special needs were able to participate with success. (I used a filter to protect the privacy of students.) 

Friday, January 15, 2016

Kicking it with Recorder

My 4th graders are always SO excited to receive their recorders at the beginning of the school year. They can hardly control themselves when they hear that the shipment has arrived. They begin by working on basics (more info in Recorders Rock) and then start earning belts as they progress through a series of songs. 

Over the years, the pattern has been that MOST students earn white very quickly and yellow fairly quickly. Then some students take off and fly, while others hover around blue and green. (There are always a small handful of students who really struggle with passing the lowest levels.)

All of my students have their own recorder that they purchase in a packet with Artie Almeida's Recorder Express method book. All music for their belts can be found in their book. We also have a class set of books, so they don't have to travel back and forth. 

During class, I have always projected the music on the screen to track and keep students' focus where it should be when they are playing. ("Always" translated: ever since I got a document camera and projector!) I used to cover up parts of the song and zoom in to a couple of measures at a time while students were learning a new song. This year, I decided to create something with more visual appeal and ease of use. I broke down each song into chunks and notated them with large noteheads to help emerging music readers identify the pitches more easily. I used some cute graphics to foster excitement. I have all 10 belt levels (15 songs) in one PowerPoint presentation with 72 slides.

There are slides that introduce each piece in small excerpts. We work through each slide together by reading the rhythm, reading and fingering the pitches, and finally by playing it. The final slide for each song has the entire piece.

If there are challenging passages in a song, I might start the song sequence with that portion. In "Hop, Old Squirrel," beginning recorder players usually have the most difficulty with this passage:
If there are two parts of a song that are similar, I might have a slide that highlights the difference to help them prepare for the change:
If there is one particular pitch that tends to give students trouble, I might highlight it blue: (In this instance, we stop and practice moving from e to a several times before trying the whole excerpt.)
Often, there will be slides that combine two of the shorter introductory slides before moving on to the complete piece:
Finally, there will be a slide with the entire piece:
I love having all of the visuals so accessible. We can zip through different pieces at the touch of a button. There is no more looking up page numbers, flipping pages in a book, and then adjusting the document camera to zoom and focus right where I want. Now, the PowerPoint has everything ready to go at the push of a button. 

It took quite a while for me to get all of the slides done, but I was able to stay one step ahead of my students. That reminds me...they are ZOOMING through their belts. My 4th graders have already passed the majority of my 5th graders that didn't get to use these visuals. They are reading so well, that I almost feel like I have a beginning band sometimes. I think there are several factors that have led to their success:
  1. We really focused on learning the pitch names at the end of 3rd grade.
  2. We used newly created graphics (Swingin' into Treble) for learning music notation.
  3. They love playing Around the World, which improved their ability to identify pitches even more.
  4. "Kicking it with Recorder" takes what we were already doing and makes it easier to see, identity, and break down songs, which increases their success. It doesn't hurt that they enjoy looking at the graphics.

If you use Recorder Express and would like to check out my reward system for this book, you can access it for free through my TpT store, Make Music Rock. The following products are beneficial for recorder players and are also available for purchase:

More products for the elementary music classroom are listed and described on my Resources page.

I hope this post has inspired you to start Kicking it with Recorder!

Thursday, October 15, 2015

Monster Rhythms

My students LOVE to play instruments! (Duh!) It's easy to get them to practice reading and playing rhythms - especially with fun and festive slides like these monster rhythms. I projected this brand new set in my second grade class and, and students ate them up.

My instruments are set up in three rows, and students zig, zag, zig through the rows. In other words, they move to the right on row 1, left on row 2, and right on row 3, followed by one quick zoom from the last instrument back to the beginning of row 1. Rows can include barred instruments in a pentaton, unhitched percussion, or a combination of both.

Since it is fairly early in the year and I only see them once a week, we used my introductory method of playing the slides.
  1. Say It: I count down: "8, 7, 6, 5, 4, 3, play it now." Students say it without playing
  2. Say and Play It: Students speak and play the rhythm (Play should continue without missing a beat. I sometimes speak in rhythm and give directions while they are playing to keep them on track.
  3. Just Play It: Students should think the rhythmic syllables while they play.
  4. Rotate: Students move to the next instrument while I click to the next slide and begin the countdown again. They know they only have 8 beats to get ready, so they move quickly and with purpose.

When students are proficient, they say and play each slide twice without stopping before rotating to the next instrument. When this works well, they are ready for their favorite rhythmic game: Poisoned Rhythms. I created this Monster version to go along with our new practice slides.

Students will strive to outwit the monsters by avoiding playing the poisoned rhythm. The "punishment" isn't too bad: they simply move to the next level of instruments. Complete instructions for the game are included in the product file.

The practice slides and the poisoned rhythm game are available at my TpT store. The bundle includes everything you need for a monstrous good time, plus it includes a discount:


I hope these ideas inspire you to make your music class rock!

Wednesday, October 14, 2015

Monster Recorder B-A-G Rhythms

My fourth graders began learning music notation last year. They are doing a great job at identifying notes. We have been playing Around the World - Treble Staff, so I know they can name the pitches. I wish they were doing as well at producing a pleasing tone on the recorder. I know they will get there. We just haven't had a lot of time in class to work, yet.

I wanted a quick way for them practice and for me to assess and assist, as needed. I created a quick monster-themed PowerPoint filled with 4-beat rhythmic slides. I assigned letter names to the notes, so I students could practice fingering and playing B, A, and G. I'm usually a stickler for reading the music and don't allow them to write letter names in their books. I usually want them reading the notes, instead of letters; but this time I was more concerned with helping them improve their tone and articulation.

I created three different levels of Monster Recorder B-A-G and began using it this week. We began with Level 1, which keeps each 4-beat rhythm on one pitch. It was easy to spot students who were playing the wrong pitch, either due to fingering the wrong pitch or not completely covering holes.

Here is the procedure we followed this week: (I'm sure I'll tweak this as we go.)

  • Students read and fingered the rhythm silently
  • All students played the example once
  • We identified issues with rhythm or pitch and then played it twice in a row.
  • Groups played examples, so I could more easily identify specific students needing help. (I have divided my class into 3 groups. They numbered off in their order, so no one sits by a neighbor in the same number group. I use this system often, because they can hear themselves better and I can focus on fewer players at once.)
Level 2 increases the difficulty by having examples that include more than one pitch, but all movement is stepwise.

As my students improve, I plan to use Monster Recorder to play a game. I'll divide the class into two teams and have individuals from teams play. They can earn points. I'm thinking of this point system:
  • 1 point for correct rhythm (but not all pitches or pleasing tone)
  • 2 points for correct rhythm & pitch OR rhythm & tone (problem with pitch or tone)
  • 3 points for proper rhythm, pitch, and tone 


Level 3 steps it up another notch and adds leaps between B and G. All levels use pretty basic rhythms, which include quarter notes and rests, half notes, and eighth notes.


Each level is available in my TpT store, as well as a bundled set available at a discount. You can find them here:

Happy Playing!

Saturday, October 3, 2015

Around the World - Treble Staff Game

My fourth graders traveled around the world this week. Okay, it's not what it sounds like. We didn't leave home, but we did have a passport to an entertaining way to practice identifying treble note letter names! Around the World is a game many teachers use to review, practice, and assess various skills, and I thought it would be a great way to make identifying notes exciting for the students.

I created a game using PowerPoint and tried out two versions of play with my students this week. They had a blast and begged for more when it was time to go.

Game Play

Version 1 - Basic Play

  • Class sits in a semi-circle.
  • Student 1 stands behind Student 2.
  • Teacher counts down 5-4-3-2-1 and changes slides to reveal a new pitch.
  • Student 1 and 2 compete to identify the letter name of the pitch displayed on the screen.
  •  The first person to call out the correct pitch name is the winner. If the first answer given is not correct, the other student wins the round.
  • Teacher changes slide to reveal the correct answer.
  • The winner moves on and stands behind Student 3.
  •  The other student sits in spot 2.
  •  Play continues with the winner moving forward and the other student sitting in the spot.
  • The winner of the game is the first person to make it around the world and back to his/her “home.”

Version 2 - All Play

  •  Class sits in a semi-circle, grouped in pairs. Each pair needs 1 set of A-B-C-D-E-F-G game pieces.
  • Students must work silently.
  • Students must place both hands on their knees as the teacher counts down 5-4-3-2-1 and changes the slide to display a new note.
  • Pairs of students compete to identify the letter name of the pitch displayed on the screen and pick up the correct letter piece. (Both students can pick up a piece if they select different answers.)
  • Students hold their pieces in the air to signal they are done.  (They should not let others see their choice.)
  • When each group is ready, the teacher changes slide to reveal the answer.
  • The winner moves left to the next set of pieces, while the other student remains in place.
  • If neither player selects the correct answer, they remain in place and the person moving toward their group gets to skip over to the next set.
  • The winner of the game is the first person to make it around the world and back “home.”
  • Gameplay may continue.

"All Play" Tips

During the "All Play" version, I put a chime tree in the center and let the students quickly step forward and play it to signal when they had made it around the circle.

The "All Play" version requires a set of game pieces for each pair of students. I wanted to use different colors for each letter, so I could sort sets easily if they got mixed up. The pieces can be made out of anything that is durable and can withstand students grabbing. I considered several options and decided to use poker chips that I found online in a rainbow of colors. I used a permanent marker to label them. They are heavy and the perfect size for students to pick up and hold in their fists without others seeing the color. Bottle caps would also work as durable game pieces.

I gave specific instructions about playing safely and fairly. An important rule for them to remember is to keep their hands on their knees until the note is displayed and it is time to pick up a piece.
There were a couple of instances when I had to have a play-off for one set of students for different reasons. Overall, students played nicely and enjoyed the competition. I have to absent next week, and I know what my 4th graders will be doing while I'm gone!

Resources

You can play this game by simply drawing notes on the board, but I loved the ease of having the PowerPoint presentation. The graphics also make it more festive. If you would like to purchase a PowerPoint version of the game, you can head over to my Teachers Pay Teachers Store that I just opened. Two versions are available: one with basic treble notes from line 1 to line 5 and another with extended treble notes ranging from middle C to G above the staff. There is a discount for a bundled set of both version available, as well. You can access the items below.


Happy travels!